# Performing a Stocktake During Trade
Once it has been decided that you will perform a stock take during trading hours, 3 steps are required.
1. Prepare Stocktake
2. Stocktake Entry
3. Stocktake Update
Items undergoing the stocktake cannot be sold or stock receipted during the physical count, until the count is entered into the Stocktake Entry screen, hence the physical count of an item must be entered into the system as quickly as possible.
### Step 1 - Prepare Stocktake
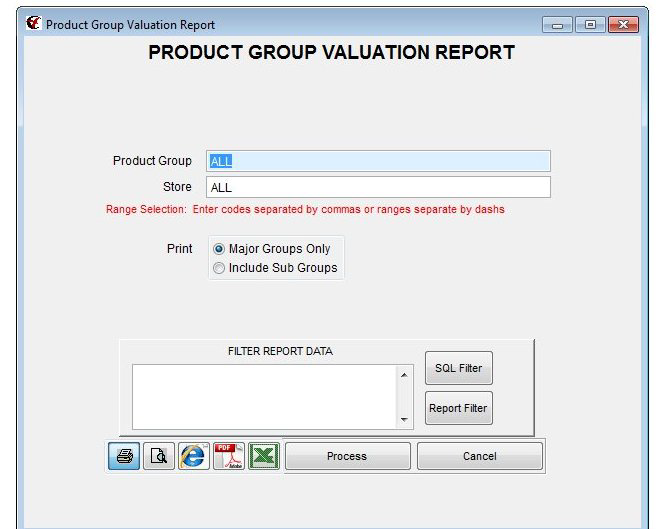
To compare the value of stock before and after the stocktake, print a **Product Group Valuation** report **before** the stocktake is commenced and **after** the stocktake is completed.
The Product Group Valuation Report prints the value of stock in each product group. If stock control is not currently utilized, a Product Group Valuation Report will not be accurate.
For more details on producing a Product Valuation Report, refer to:
**Inventory -> Stocktake -> Product Group Valuation Reports**
### You prepare a stocktake by
- [ ] Select **Inventory -> Stocktake -> Prepare Stocktake** The **Prepare Stocktake** dialogue is displayed:

- [ ] Leave the **Product Code** field set to **ALL** or a specific product can be selected
- [ ] In the **Product Group** field select the product group that you wish prepare for stocktake.
**F4** allows you to search for a product group select the group you require.
- [ ] Proceed through to the **Store** Field which can be left at **ALL** or a specific shop can be selected
- [ ] Leave the **Fixture** field set to **ALL**
- [ ] **Date of Stocktake** defaults to the current date
- [ ] Click the **Prepare for Stocktake WHILE TRADING** Button
- [ ] WARNING: The stocktake count for each product in the selected product group(s) will be set to zero
- [ ] The stocktake date for products within the product group range is set
- [ ] Alternatively, choosing the **Cancel** button or pressing the **Esc** key will **cancel the Prepare Stocktake process**
### Step 2 - Stocktake Entry
- [ ] Select **Inventory -> Stocktake -> Stocktake Entry** The Stocktake Entry dialogue is displayed:
The stocktake entry can be done by manual counting and entering data, or using a Portable Data Entry (PDE) unit, both methods are detailed below.
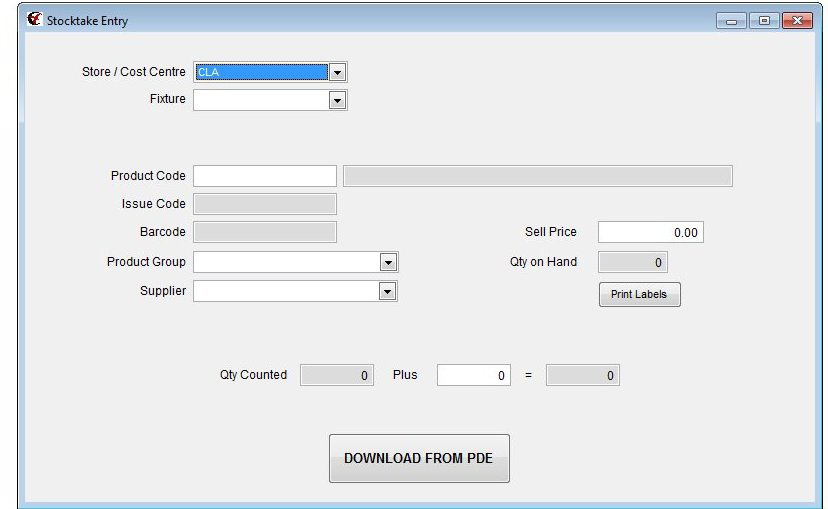
- [ ] Select a **Store / Cost Centre** or press **enter** to select the default one
- [ ] Press **enter** to bypass the **Fixture** field
- [ ] Press **enter** to move the focus to the **Product Code** field
- [ ] Entering Stock Manually
- [ ] Scan the barcode on the product into the **Product Code** field
The description is automatically displayed in the description field to the right of the Product Code field.
The Quantity on Hand figure will display zero as a result of the stock take preparation process.
- [ ] Type the physical count into the **Plus** field
- [ ] Press the **enter** key
The focus returns to the **Product Code** Field
The extra quantities of an already entered item can be added into the **Plus** field and the **Qty Counted** field will be updated accordingly.
- [ ] **Entering Stock using a Portable Data Entry (PDE) unit** Use the PDE to scan a maximum of 20 items at one time in the selected product group range. It is best to download a limited number of items into the PDE at one time. Should there be a read error there is less stock to trace back the error.
- [ ] Connect the PDE unit to the Computer
Ensure that the PDE unit is correctly connected before attempting to download, otherwise the item count may be lost. See PDE device user manual to ensure the correct connection. (Refer client setup information for the relevant PDE unit as to how to connect the unit to the computer. )
- [ ] Choose the **Download from PDE** Button
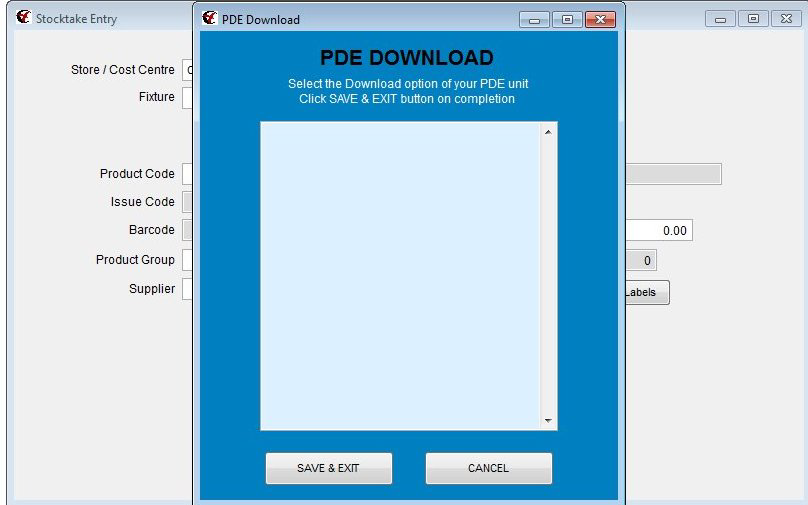
- [ ] Transmit Data from the PDE Unit
- [ ] The data is displayed in the **PDE Download** screen
- [ ] Press the **SAVE & EXIT** button in the PDE Download screen
An error report will print out bar codes of any product not found in the inventory file. The report will indicate the last good barcode scanned. You will need to find the rejected product, create an inventory item, and rescan the product with the PDE.
WARNING: Do not enter a stock on hand quantity whilst creating the inventory item
- [ ] Repeat PDE scanning and downloading procedure until all stock with the selected product group has been entered.
The PDE download will accumulate the stocktake count when a product is counted in more than one lot.
### Step 3 - Stocktake Update
Once all the products in the selected product group range have been entered into the stock take entry screen proceed with the stock take update. The quantity on hand in inventory maintenance will now be updated.
- [ ] IMPORTANT: Logout of Computerlink on ALL terminals
- [ ] IMPORTANT: Perform a Backup of the Database (keep this separate to your normal backups)
- [ ] Open and log into Computerlink on the terminal where you will be performing the stock take update
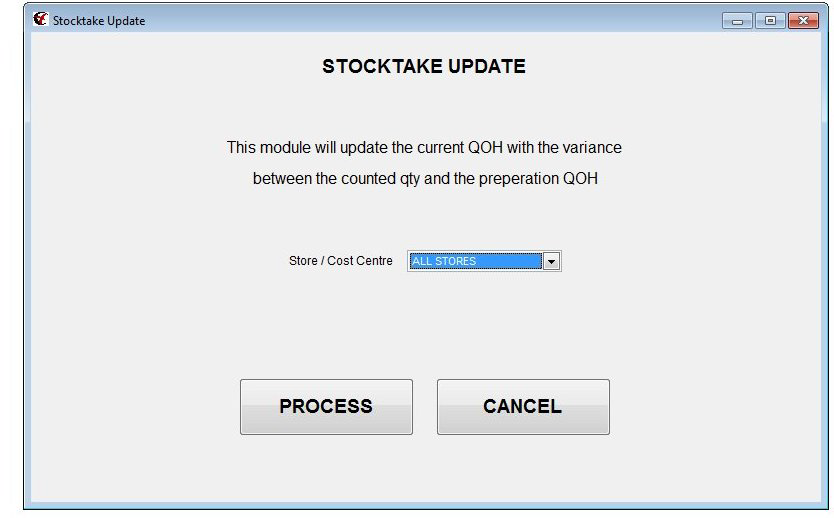
- [ ] Select **Inventory -> Stocktake -> Stocktake Update** The **Stocktake Update** dialogue is displayed:
[](https://docs.computerlink.com.au/uploads/images/gallery/2023-06/stocktake-update.png)
- [ ] Click the **Process** button
- [ ] The current quantity on hand is calculated – it will equal the stocktake count less sales plus incoming stock that may have occurred after the stocktake entry step.
- [ ] The inventory file is checked for all products that have a stocktake date set and updated with the current quantity on hand figure.
- [ ] The stocktake quantity and stocktake count are set to zero and the stocktake date is deleted.
- [ ] For new users, Stock Control will be set ON for each product in the stocktake.
- [ ] Continue this process for each different product group to be counted. To see the difference at the end of each group, print a **Product Group Variation Report** after each group is processed.